+86 13110089902
 bella.zhang@free-optic.com

How to Choose the Right Laser Part Marking Machine for Metal & Plastics
August 28, 2026
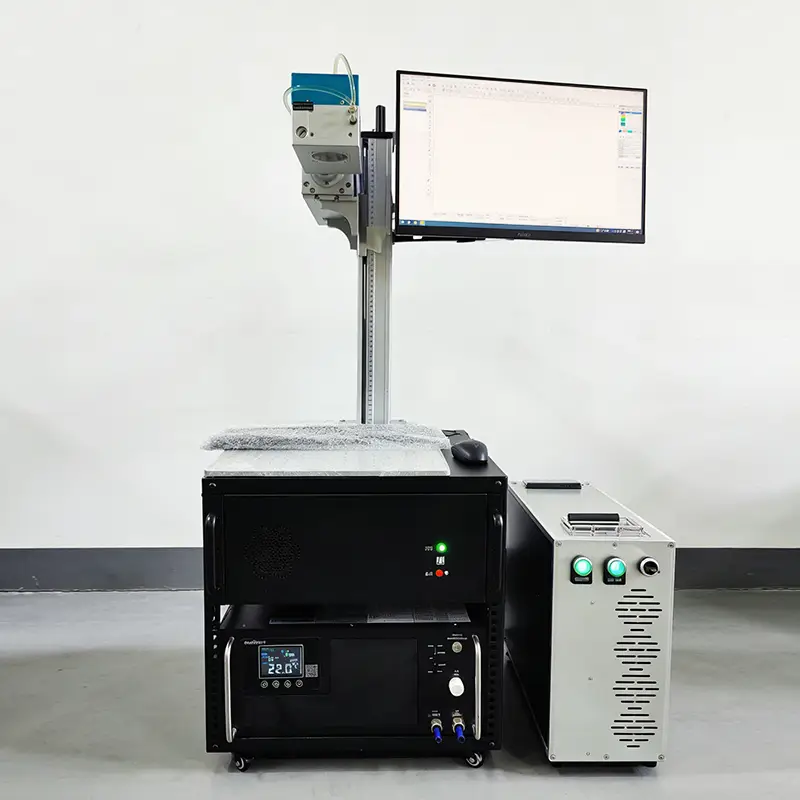
Selecting a laser part marking machine for metal and plastic components is one of the most important equipment decisions a manufacturer makes. The right machine delivers permanent, high-speed identification for years; the wrong one creates rejected parts and wasted budget. This guide walks through the six decisions that separate a good purchase from a great one — from laser source and power to software and automation.
Step 1: Match the Laser Source to Your Materials
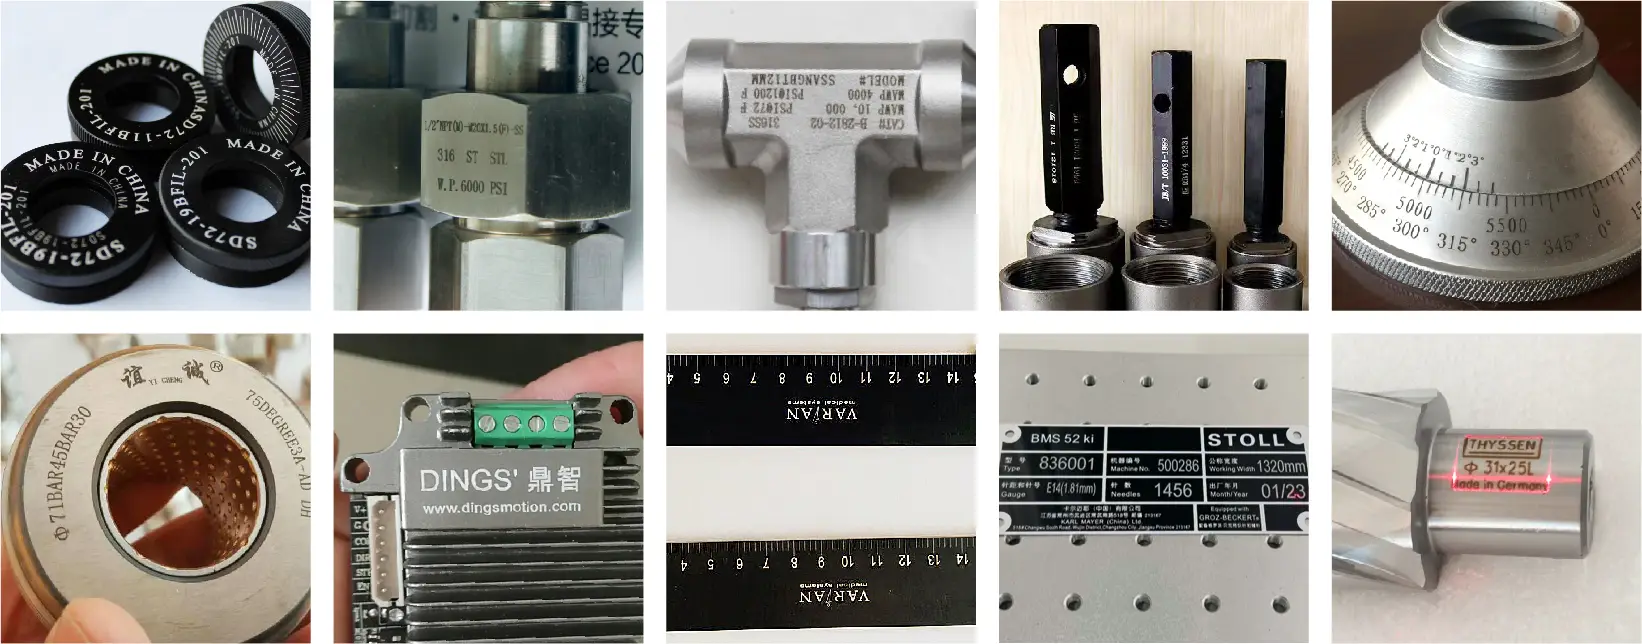
The laser source determines what you can mark. Fiber lasers are the industry standard for metals such as stainless steel, aluminium, titanium, brass and hardened alloys, and they also mark dark or laser-sensitive plastics with excellent contrast. UV lasers are preferred for heat-sensitive plastics, glass and ceramics where thermal damage must be avoided. If your product range is mostly metal with occasional plastic parts, a fiber laser is almost always the right starting point.
Fiber lasers for metals and engineered plastics
A 1064 nm fiber source anneals or engraves metal surfaces for durable, high-contrast serial numbers, logos and 2D codes — and it handles engineered plastics like ABS and PBT without pre-treatment.
UV lasers for heat-sensitive plastics
For thin films, medical-grade polymers or lightly coloured plastics, a 355 nm UV laser marks cold, leaving no burn marks or micro-cracks.
Step 2: Choose the Right Power (20W, 30W or 50W)
Power controls both marking speed and engraving depth. 20W models are ideal for most surface marking and shallow engraving at maximum speed. 30W adds depth for tougher metals and faster cycle times. 50W machines suit deep engraving, black anodizing removal and high-volume lines. Buy the power your hardest material needs — not the maximum the brochure offers.
Step 3: Evaluate Marking Speed and Cycle Time
Ask for benchmark speeds on your own parts: typical logos complete in under a second, and Data Matrix codes in 200–500 ms on a 20W fiber. If parts arrive on a conveyor, make sure the marker can keep up at peak line speed, including the time for focusing and triggering.
Step 4: Check Marking Area and Workpiece Handling
Marking field sizes typically range from 110×110 mm to 300×300 mm. Large enclosures or tall parts may need a 3D or extended-Z version to keep the beam in focus across the whole surface. Confirm the working height, door clearance and whether a rotary axis is needed for cylindrical parts.
Step 5: Look for Software and Automation Compatibility
Modern marking software should import DXF, PLT, SVG and common image formats, generate serial numbers and date codes automatically, and log every mark for traceability. For Industry 4.0 lines, check for PLC, IO or EtherCAT integration so the marker talks directly to your production system.
Step 6: Verify Build Quality, Safety and After-Sales Support
Check the laser source brand, scanner quality and the chassis build. Class 1 enclosures with interlocked doors protect operators, and CE certification simplifies compliance. Finally, confirm warranty terms, spare-part availability and local technical support — a machine that stops for weeks costs more than the purchase price.
Quick Selection Checklist
For metal parts
Fiber laser · 20–30W for surface marking, 50W for deep engraving · standard marking field · rotary axis for cylinders.
For plastic parts
Fiber laser with tuned parameters, or UV laser for heat-sensitive polymers · lower power, higher frequency for light marks · ventilation for plastic marking.
Conclusion
Choosing the right laser part marking machine comes down to matching laser source, power, marking area and software to your real production workload. Test your own parts before you buy — most reputable suppliers, including Free Optic, offer free sample marking so you can verify contrast, speed and durability on your actual materials.